

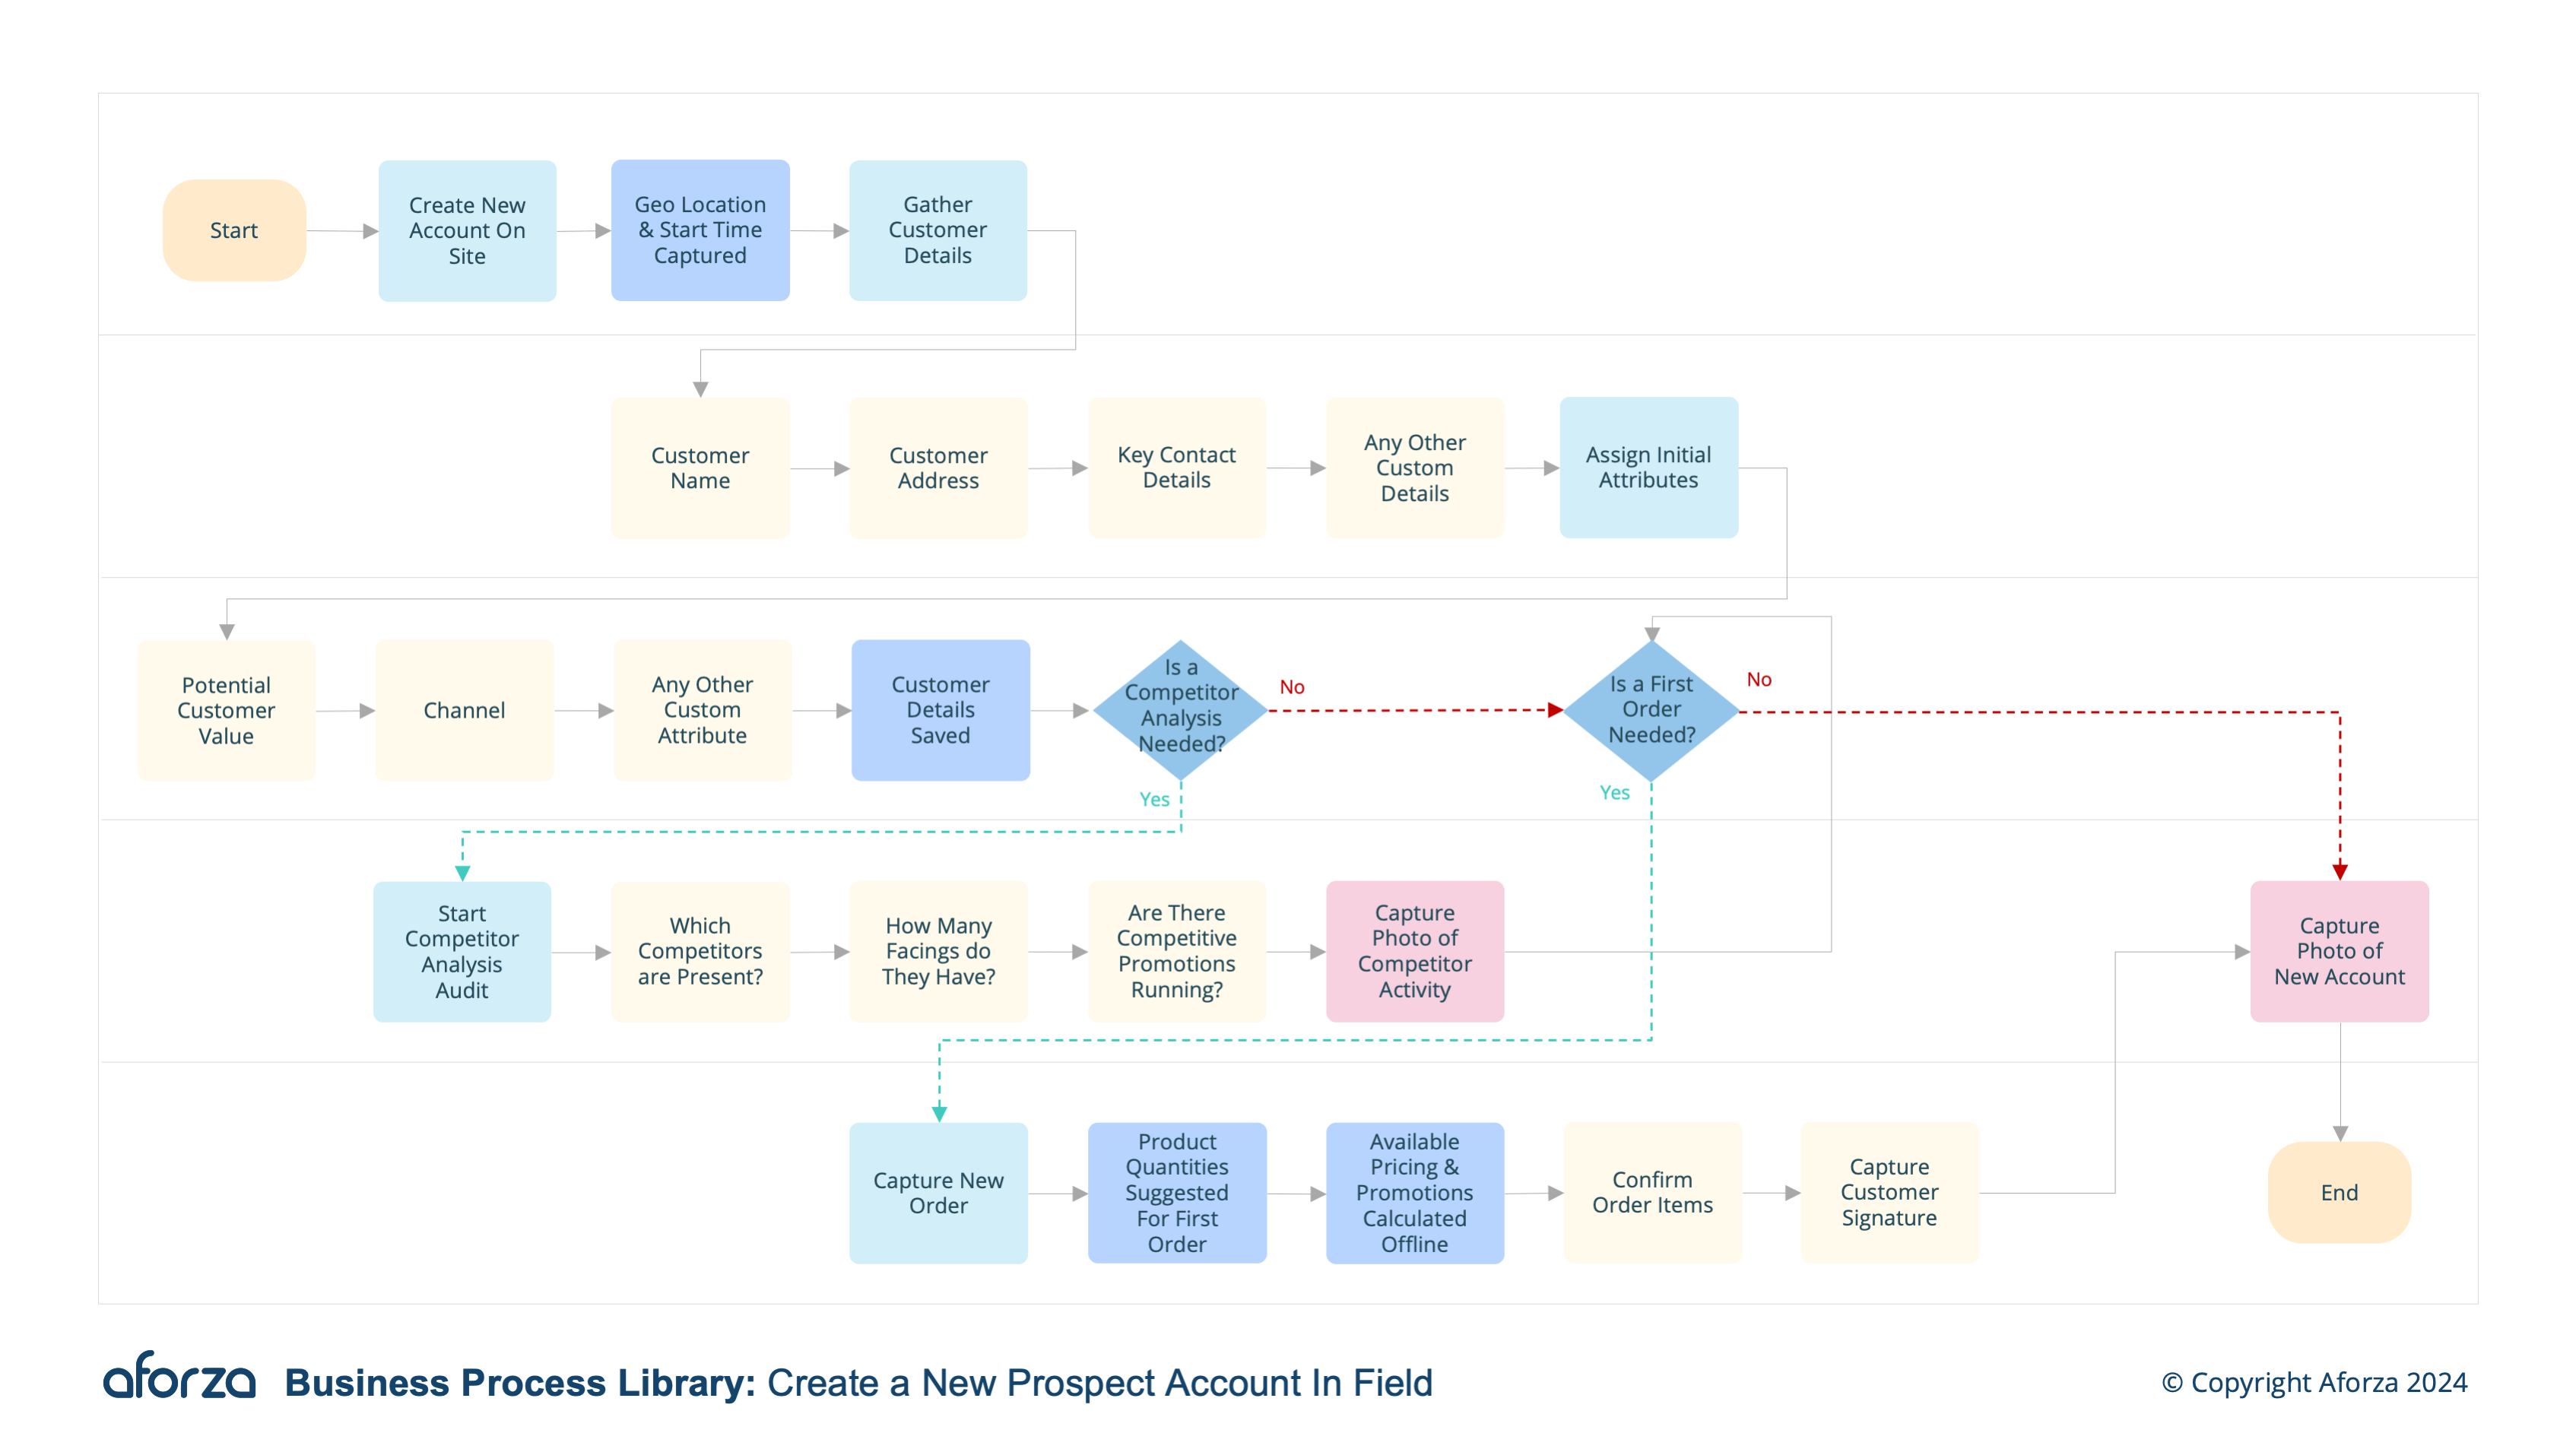
Business Process Overview
- Account Creation: Create new account, capturing compulsory details such as name, address and contact details.
- Capture Geolocation: Trigger the capture of geo coordinates to increase future visit accuracy
- Assign initial attributes: Define initial attributes like potential value, interest level, and industry type.
- Schedule initial visit: Plan a follow-up visit or call to further qualify the prospect.
- Complete prospect creation: Save the new prospect account details and sync to HQ for tracking and follow-up.
This involves creating a new account with essential details, capturing geolocation for future visit accuracy, assigning initial attributes to gauge the prospect’s potential, and scheduling an initial follow-up visit. The process concludes with syncing all the captured data to headquarters for tracking and further qualification. This structured approach ensures that no prospect details are missed, improving the accuracy of future interactions and optimizing the sales pipeline.

1. Account Creation
This step involves creating a new account by capturing essential details of the prospect.
- Enter the prospect’s name.
- Record the prospect’s address.
- Capture contact details such as phone number and email.
- Verify the accuracy of the captured information.
- Save the account details.

2. Capture Geolocation
This step triggers the capture of geolocation coordinates to ensure accurate future visits.
- Enable geolocation services on the mobile device.
- Capture the geo coordinates of the prospect’s location.
- Verify the accuracy of the captured coordinates.
- Save the geolocation data with the account.
- Ensure the geolocation is linked to the prospect’s address.

3. Assign Initial Attributes
This step involves defining initial attributes to assess the prospect’s potential.
- Evaluate the potential value of the prospect.
- Determine the prospect’s interest level.
- Assign an industry type to the prospect.
- Record any additional relevant attributes.
- Save the attributes with the prospect’s account.

4. Schedule Initial Visit
This step involves planning a follow-up visit or call to further qualify the prospect.
- Select a suitable date and time for the initial visit.
- Confirm the visit details with the prospect.
- Schedule the visit in the system.
- Prepare any necessary materials for the visit.
- Ensure the visit is logged in the prospect’s account.

5. Complete Prospect Creation
This step involves saving the new prospect account details and syncing them to headquarters.
- Review all captured details for accuracy.
- Save the prospect account in the system.
- Sync the new account details with headquarters.
- Notify relevant stakeholders of the new prospect.
- Prepare for follow-up activities based on the captured data.